Home » Shapes and Spaces

Category: Shapes and Spaces

Constructions with compass and straight edge

The easiest way to learn constructions with compass and straight edge

I do find constructions with compass and straight edge is one topic that is easiest to tutor by watching videos together

I know how to do them, but when I have previously taught large groups , I have let others do the demonstration by using YouTube Videos!

In fact, I am going to do the same in this post!!  But first let me explain some history, because constructions with a compass and straight edge have a place in ancient history. It was one of those things the Greeks of antiquity liked to do. In fact it was they who chose the rules.

So what exactly are these ‘Constructions’? Basically they are exercises in Geometry. There are a few of them but here we will look at three.

The constructions – What are they?

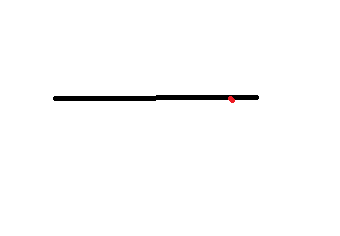
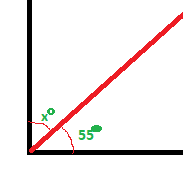
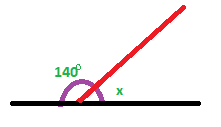
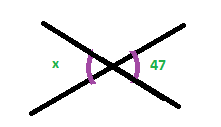
The first asks use to bisect a given line. Bisect means ‘divide into 2 equal parts.  (Note all these drawings are example sketches. They have not been created by constriction. See the videos below on how to do those.)


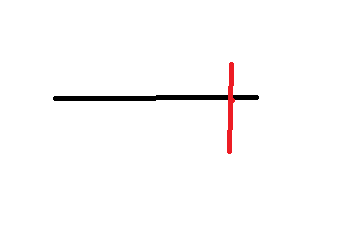
Then draw a perpendicular line  at a chosen point on a line.


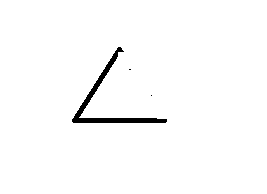
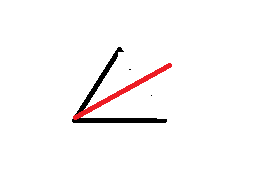
And then, Bisect an angle


You might be thinking – well that looks easy enough; just use my ruler and protractor. But that is because I haven’t shared the major catch; You can only use a pair of compasses and a straight edge. The rules say specifically a straight edge – You can use a ruler, for this BUT you have to ignore the markings!   This is NOT a measuring exercise.

Why these restrictrictions? Were those ancient Greeks being just plain awkward? Well maybe, but also, they may not have had a protractor, but mostly this is an exercise in how things fit together.

This is the point where I hand over to other experts…..


Here are some more videos showing these constructions


Angling for some fun? Part One.

Do you know about Angle types?


There are a lot of questions you will see that ask you to find the size of an angle, or to show that two angles are the same. To answer these questions you need to know your angle types

Answering these questions, you also have to give reasons, and in giving reasons you need the language for describing different patterns with angles, and different ways of how you can find the size of angles from other angles.

So over this weekend I’m going to post some of these rules, and the names you need to give while describing those rules…..

And I’ll be honest, I have to look some of them up!  Not the rules themselves – I know all of them – but some of the names for them.

After these posts, I’ll give a couple of exam questions and show how to use the names of the rules in your explanations.

Let’s have a look at our first two angle types

Complementary angles

Angles that pay each other compliments!  That’s nice.  Well, not quite

The first thing is to remember that there are 90˚ in a right angle and 180˚ in a straight line. How can we use that information to find missing angles?

Complementary angles
Showing than angles in a right angle add up to 90 degrees

In all these three examples, we are looking to find the number of degrees in angle x.

In this case x and 55˚  make up a right angle, or 90˚ – so x = 35˚ due the ‘angles in a right angle’.  And that is what you should write, to show that you have understood the reason for the answer.


Complementary angles 2
Showing than angles along a line add up to 180 degrees

In this example, x and 140˚ make up a straight line, which is 180˚.

So x = 40˚ due to ‘angles along a straight line’. Again, that is what you should write.

Opposite Angles

Opposite angles
Showing that angles on opposite sides of a cross over are equal

In this case, angles x and the one marked 47 are the same size. This is the law of opposite angles. You might be able to see that this is the angles on a straight line, applied twice, but remember the term ‘opposite angles’ and there no need to work out the other angles.  We write

x = 47˚ , opposite angles.

In my next post I will add alternate angles and corresponding angles to the mix. Then we will be ready to tackle a lot of angle questions.

You can find more information about types of angles here

Angling for some fun continues here


Tutor Note: On Scales and maps

The last post was longer than I originally planned so I thought I would make this as an extra post to cover a point aimed mainly at fellow tutors and educators.

With some students, getting them to make good use of the paper is challenging for me. They draw in just the bottom corner. Though this experience is more to do with bar charts and similar graphs, its equally the case with maps and scale drawings.  But make mistake, choosing a good scale is NOT a trivial matter, but sometimes it feels it should be easy, which means it can be a hard thing to tutor. Teaching something that people know is hard – quadratic equations maybe – is a challenge  but its a challenge able students are up for.

Trying to get over a point on something where the size of the challenge isn’t immediately obvious is a whole different ball game.

Drawing the Park – The Answer

Yesterday I posed the question of how to draw a map of a playing field.  The first thing to do is decide on the scale. I like to see people use as much of the paper as possible, but there is another consideration too, as I shall show.

With some students, getting them to make good use of the paper is challenging for me. They draw in just the bottom corner. Though this experience is more to do with bar charts and similar graphs, its equally the case with maps and scale drawings.  But make mistake, choosing a good scale is NOT a trivial matter – I’ll make another post on this at the moment, directed at other tutors.

In this case we can use all the paper by using a scale of 1cm = 6m – Note that if we think centimetres for metres, 150 = 6 x 25 and 120 = 6 x 20.   I’d advise against this. In fact I’d advise against any scale that uses factor not based on 5, 2 or 1 (That is 50, 500, 0.5, 20, 200, 0.2, 10, 100 and so on).  These scales make the Maths much easier to understand, both in making the drawing and interpreting it.

I say this from experience without wanting to justify it much further now. Just think of times you have been abroad and the exchange rate is £1 = 60 of the local currency. The mental arithmetic working out how much you are spending becomes tricky.

I’ve waffled a lot today, lets get down to business.   I recommend a scale for this map with  1cm = 10m – 1:1000.

We would draw the full park as rectangle 15cm by 12cm. This only uses part of the paper but we do need space to a title, key and scale – and its better than the 1/4 of the space available I sometimes see.

We draw on the football pitch now. This will be 10cm by 6cm. Where we place it can be ‘trial an error. In fact, if you have scissors to hand (which won’t be likely in an exam!) we can cut out a rectangle with those dimensions and move it round the larger rectangle. We can also cut out a rectangle that is 2cm by 2cm for the play area.   The trees need to be 1cm from the edge and each other and at least 2cm from the football pitch. There is more than one solution but here is mine, with the distances shown in cm in my drawing, as your browser size won’t show the same distances
When you think you’ve finished its worth checking each of you positions and measurements again, to check they comply with the rules

Drawing our own map

In my last post I describe how we could get information about distances from a map using a scale. In this post we will look at how we can use the idea of a scale to draw a map of our own

Think of the following question : Source, my own imagination but I have seen similar questions in Exam papers

My local park is 150m long and 120m wide. We need to plan the park to have one football pitch (100m by 60m), a play area for younger children (20m by 20m) and places to plant 5 trees. Each tree should be at least 10m from the edge of the park and 20m from the football pitch. There should be 10m at least between each item.

We are given a sheet of paper measuring 25cm by 20cm.

See if you can have a go. The answer will be posted tomorrow.

So how do Maps work?

Since I’ve spent a weekend studying maps, I thought a quick post on the maths involved would be in order. Although it might not be immediately obvious, what we are looking at are Ratios – and this can be a pleasant change from mixing paint which is what many questions in Exams about ratio seem to be about!

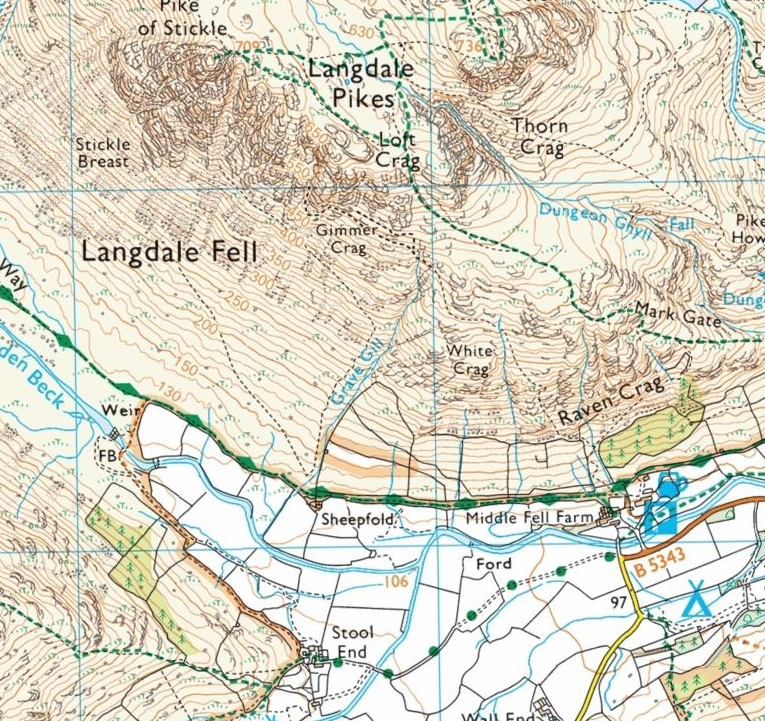
Now here is a map of one of my favourite places in the world – and comments from anyone who agrees are welcome!  The point is, a map represents the place you want to visit so obviously has to be a lot smaller than the place itself!  (Ok so this reminds me of a favourite Blackadder joke but lets not get off the point)

The map shown here is to the scale 1:25000 if you have it before you. (I can’t make a similar claim from the picture you can see, as that will depend on the size of your browser!)

If you measure on the map that you are 2cm from the car park and pub*, how far do have left to walk?

2 * 25000 = 50000cm.  Which is great but we don’t usually measure walking distances in centimetres. 50000cm = 500m or 0.5km

Activity  : Find a map of your town and measure the distance to a place your often visit.  Don’t assume your map has the scale 1:25000.  The scale for your map will be written somewhere, perhaps even the front of the map.

*Actually the first pub I ever had a pint of beer!

World Cup Time! – How big is a football Pitch

People may be surprised to know there is no fixed size for a football pitch, just a range

The length of the pitch must be between 90m and 120m, the width must be between 45m and 90m. For some reason a bit of trivia I remember from my childhood is that Doncaster Rovers had the widest pitch – (That quite probably isn’t true now as they moved grounds)

Oh and one other restriction is that a pitch can’t be square – 90m x 90m is not allowed.

Question – In percentage terms how much bigger than the smallest pitch can the largest pitch be?

On these figures, the smallest pitch would be 90m x 45m = 4050m2

The largest pitch could be 120m x 90m = 10800m2

So the largest pitch could be 166% larger than the smallest pitch!


In reality that doesn’t happen, the pitch sizes in the Premier League last year ranged from 7140m2 at Bournemouth    to 6400m2 at Stoke City.

Work out those angles – another worked exam question

Today we look at another exam question, where we are asked to work out those angles. Or at least one named angle

Angle Diagram

I was working on this question with a student a couple of weeks ago, and he worked out the answer quickly, but wasn’t quite able to describe why….  so this one is for you, Joe.


For a question like this, we do need to show we understand the reasons why each stage of the answer works.  Relationships between angles often have names (Complimentary angles, Associate Angles) but we don’t need to know these for this question.

We do need to know.

  • Angles in a triangle add up to 180
  • Angles in a pentagon add up to 108. (That might not be as widely known, I’ll cover this in a later post)
  • Sides in a regular pentagon are all the same
  • Two angles in an isosceles triangle are the same.
  • Angles in Right angle add up to 90.

So these are the steps that Joe took, in his head.  (He is an able student.) and the reasons he, and we, need to give at each stage for full credit in an exam.

  1. Angle ABC = 108  – Its an angle in a Pentagon
  2. Triangle ABC is isosceles (Two of its sides are sides of a regular pentagon)
  3. <ACB = 36 – Its one of the other two angles in triangle ABC so = (180-108)/2
  4. <BCD = 108 – Its another angle in the pentagon
  5. <ACD = 72 –  Angle ACD – ACB
  6. The answer  DCF = 18 because its = 90 (Angle ACF, in the square) – 72( Angle ACD).And that is showing our working, with reasons. I think talented students sometime leave the rest of us behind with their logic, but explaining what we are doing is an important skill!

Now you have a few clues on how to work out those angles missing in any exam question.


You can find a list of facts about angles that can be used in this sort of question here

Volume of a Prism – Exam worked example

Today’s post is a worked solution – of a question from straight off a GCSE paper.

With any question, the first ting to do is check if there are any words that are out of the ordinary.  Here, the word that stands out is ‘Prism’

I first remember using a ‘prism’ in Science lessons, because a ‘triangular’ prism can do beautiful things with a beam of light. But that is a special sort of prism – one with a triangle at each end.  Generally a prism is any solid shape that is the same all the way through.

And that is the clue to working out the volume. Work out the area of the shape of one end, and multiply that by the length.

That leaves us with the hard bit first – but at least we will know we’ve got that ‘out of the way’. How do we work out the area of the end, which is like an L lying on its side.

We need to split this up, but there are 3 ways of doing this. You might be able to see three ways of doing this; the third is a bit harder to spot.

On all of the splits, it will help you to fill in the missing sides. The short one we find by comparing the lengths on the left and right : 7cm – 4cm = 3cm

The longer missing length we can find by comparing the top and bottom. 11cm – 5cm = 6cm


I am showing the calculation for all three methods here  BUT YOU WOULD ONLY NEED TO CHOOSE ONE!

The first split is into rectangles that are 5cm x 3cm = 15cm and
11cm x 4cm = 44cm2.  Total is 59cm2.

The second alternative is 2 rectangles of 7cm x 5cm  = 35cmand
4cm x 6cm = 24cm2. Total is 59cm2 – And the result should be the same of course!

The third is harder to see but I think quite clever. The area of the shape without the missing part is 7cm x 11cm = 77cm2. The missing part is 6cm x 3cm = 18cm2

. This time we have to take the second area away – its ‘missing’  77-18 = 59cm.  Like I said, this had to be the same answer, but its a good check that it is!

[That’s a good hint with any problem solving. If you want to check your answer, find it in two different ways. If you check an answer by repeating the same steps, there is a chance you’ll make the same mistake, if you made one]


The final step is to calculate the volume by multiply the area of one end by the length. 59
cmx 20cm = 1180cm3